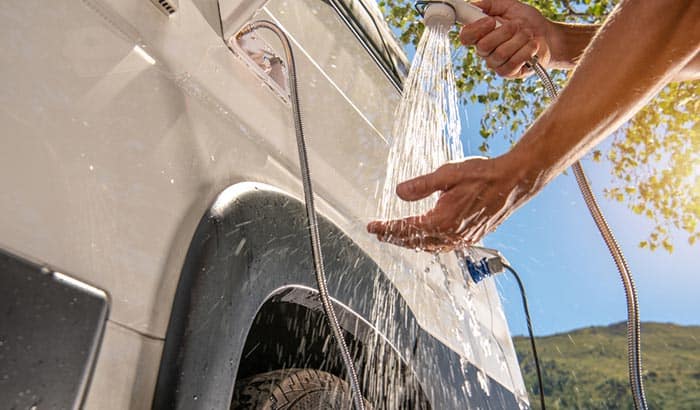
Camping can be a fun activity, but staying clean during the duration of the camp can be a challenge. Of course, when you stay in a campground with showers, taking a bath can be easy. However, for tent camping or even backpacking, taking a bath or keeping yourself clean can be very difficult. However, taking a shower for camping is possible if staying clean is essential to you by setting up a portable shower.
But how to make a shower for camping? There are many ways to do it, specifically products that can be purchased to bring a portable shower to the camp. But what we are focusing on is making a do-it-yourself shower using simple and cheap materials to create a shower for any camping activity. Please be informed that we are only focusing on the portable shower unit and not the privacy shade.
Contents
How to Make a Portable Shower for Camping
There are many ways to make a do-it-yourself portable shower for camping. Some of the methods are presented below and only use simple materials to do it.
Method 1: Making a Portable Camping Shower Using a Dex Sprayer
The best thing about this method is it is not gravity-feed. Meaning, you do not need to hang it or find a place to make the water go through. This portable shower is also super portable and comes with other uses. Meanwhile, making this portable shower is easy and also uses materials that are easily accessible to you.
Materials You Will Need:
- Pump action garden sprayer ( Also known as Dex sprayer: This can be found on most hardware stores)
- Note: Do not reuse the one that has already been used with chemicals, and make sure to use a new one.
- A garden hose nozzle
- A valve adaptor with a male thread end ( It should fit the nozzle)
- A pipe clamp
Tools You Need:
- Pliers
- Screwdriver
First Step:
You will need to screw the nozzle into the valve adaptor and use the pliers to tighten it. This material will be your nozzle assembly.
Second Step:
Then, remove the sprayer nozzle from the hose of the Dex sprayer. Store it in a safe place just in case you want to use it someday.
Third Step:
Insert the pipe clamp into the hose, then take the nozzle assembly into the hose. You may need to hit it gently with a hit guide to get the hose to fit into the valve. Then tighten the connection by using the pipe clamp using the screwdriver.
Fourth Step:
Fill the bottle with water to test the effectiveness of the shower. You can even preheat the water to have a nice hot shower.
Fifth Step:
The next step is to tighten the pump and pump up the shower to pressurized it. Then start taking a bath with our improvised camp shower.
Note: This shower can also be used for other purposes apart from taking a bath. It can be used to wash after spending a day at the beach. It can also be used to water your plants at home if it is not used on the camping site. This improvised shower has plenty of uses for you.
Method 2: Making a Portable Camping Shower Using a Bucket
In this method, we will use a bucket as the water container. Using this portable shower will need you to find a place where it can be comfortably hung to maximize the water flow. Again, this DIY shower uses easy-to-access materials for your convenience.
Materials You Need:
- A bucket
- A Waterhouse switch
- Connector pipes
- Old hose for the shower
- Valve adaptor
- Water Sprinkler for the showerhead
- Rubberized rings for tightening
Tools you need:
Drilling tool and spade drill bates
First step:
The first step is to drill a hole on the bucket using the drilling tool. The size should be enough for the hose to be inserted. This hole will be the pathway of the water going out on the outside.
Second Step:
Put the rubberize rings into the connector pipes to tightened them once inserted in the hole. Then, insert the connector to the hole on the bucket but make sure that everything is tight and no amount of water will come out. You can find ways to make it waterproof by using waterproofing sealant to ensure no water leakage will happen.
Third Step:
Insert the valve adaptor into the hose but make sure that it is tight. Then, you will need to install the water hose switch into the hole to let you turn on or off the water source.
Fourth Step:
The next step is to connect the old hose to the water hose switch. Then, connect the water sprinkler to the other end of the hose. This water sprinkle will serve as your showerhead for your convenience.
Fifth Step:
The next step is to test the reliability and effectiveness of the portable shower. You will need to put the bucket with water first. Then, find a place where it can be comfortably hung slightly above your head. During the camp, a branch of a tree can do the job but make sure that it is durable enough and can carry the weight of the bucket. During the testing, make sure to look for any water leakage, if there is any. If there is, be sure to seal it properly before using it again.
Conclusion
Learning how to make a shower for camping is an excellent skill, especially when doing backpacking and other forms of camping activity where the shower is not available. The best thing about the methods presented above is it does not use any complicated materials and can be made easily. Also, you will not spend a fortune doing the portable camp shower.
Should you need some privacy in taking a bath, you can always improvise and find materials that can cover yourself. Or, you can acquire and bring that pop-up privacy tent or privacy curtain for this requirement. The most important thing is you should not be deprived of cleaning yourself during the camp because there are so many ways to do it.