Trekking pole is essential as it helps improve your endurance, power, and improving your balance when walking on uneven trails. But do you know how to size trekking pole properly? If not, please check different methods to do it on our list below:
Contents
Method No. 1: Getting the Right Size According to Your Height
If you want to determine the correct size of the trekking pole according to your height, it should start from the top of your palm. Start by putting your arm down to your side while your forearm is held out in front at a 90-degree angle to your body.
Please note that the top of the handle should be located at the level of your waist or hips and the elbow at a 90-degree angle. People with long legs will find the height of the upturned thumb. This situation is more comfortable and better suited to the length of the stride. For shorter legs, using the size of the bottom of your palm is preferred.
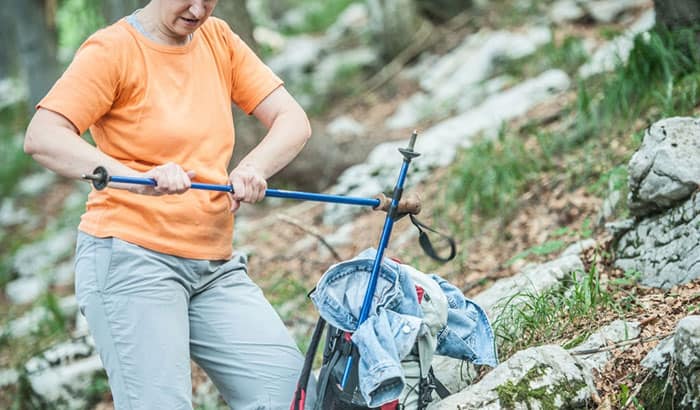
Method No. 2: Getting the Right Size When Walking Uphill
If you are trekking in an uphill terrain, you will need to make some adjustments to the size of the trekking pole. First, it should be shortened by at least a few inches. The reason for this action is to increase the load-bearing pressure of the pole so that it fits the terrain. Failure to do this will result in a pole that is too long, which means you will be overstretching when you plant them.
Method No. 3: Getting the Right Size When Traveling Downhill
When you are walking downhill, what happens is the trekking poles will usually take some strain off the knees. Meaning, it is essential to increase the length of the trekking pole by a few inches to prevent you from stretching too much when placing the pole.
Doing this action will also help improve your balance as you go downhill. The length to be adjusted will depend on how steep the hill is, but it should be around 10 inches or more. Just make the proper adjustment accordingly.
Method No. 4: Getting the Right Size When Contouring
If you are trekking and walking around the hill instead of going to the top or down, the size of the two poles will be different. The rise or uphill side will be using a shorter pole, while the fall side should be longer for additional support and balance.
How to Adjust a Trekking Pole
Once you have established the right size of the trekking pole, the next step is to learn how to adjust the trekking pole height. Please check the step-by-step guide below:
Step 1: Determine the Correct Length
As mentioned above, it is the correct length when your elbow and arm form a proper length from a 90-degree angle when you set the pole upright. Usually, the pole will come with a leaflet that contains a table indicating how long the pole should be based on your height.
Your pole has three sections, the top pole, the middle pole, and the bottom pole. So, both the middle and bottom poles will have height markings for your reference. This height marking indicates how long your poles would be if you set the same length with each pole.
For example, putting the middle pole and the bottom pole at 42 inches means the overall length of the entire pole measures at 42 inches.
Step 2: Adjusting Between Poles
When adjusting between poles, the first thing to do is to open the flip lock. And then, pull the pole down to the desired length. Look for the height marking and put the weight height that will be needed in your adjustment.
For example, if you are looking for 42 inches, you need to adjust the screw first in the middle pole while tightening it a bit. Then close the flip lock after. Please note that when there is a bit of resistance while hearing the flip lock snap, that’s the right way to close it.
If you tighten the screw a bit too much to the tightest it can go, if you do that, you will notice that the flip lock becomes almost impossible to close. You will feel that it’s going to break, which is an indication that the screws are so tight. You need to loosen it a bit.
On the other hand, if you put it too loose, you will see that there is no resistance at all on your pole. And, when you put some weights on your pole, it just slides down easily. As I have said, to tighten this correctly, you will need to have some resistance on the flip lock. Always remember not to adjust the screen when the flip lock is closed.
Step 3: Adjusting the Middle Pole
You will do the same procedure with your middle pole. Set it to the correct length while closing the flip lock properly. Now that you have set both the middle and bottom poles, the next thing to do is test if the flip lock is tightening up.
You need to stand up while putting your weight on the poles to do this. Make sure that your poles do not slide down. If you see that it slides down even if it is too little, your lock may be a bit too loose, and you need to adjust the screws by tightening it a bit more. Just one more time, please check if the flip lock is tightened correctly.
Conclusion
Learning how to size a trekking pole is essential to maximize its features and functionalities while you are trekking. The key is to get the right size and material of the trekking pole based on your height and the type of terrain you are trekking. Then, adjust the trekking pole according to its proper length.