It is normal for your walking boots to be covered with mud and dirt after hiking. But the most important thing is dealing with all the mud and the dirt and removing it away from the shoes. In this article, we will feature a step-by-step guide on how to clean walking boots so that they will be ready for your next hiking activity.
What You Will Need:
- Water Faucet or a Sink and a Bucket
- Soft Brush
- Disinfectant
Before starting the cleaning guide, please be informed that the best way to clean your walking boots is to do it after the hike. Also, putting your walking boots into the washing machine should not be done as it will only damage and reduce its effectiveness.
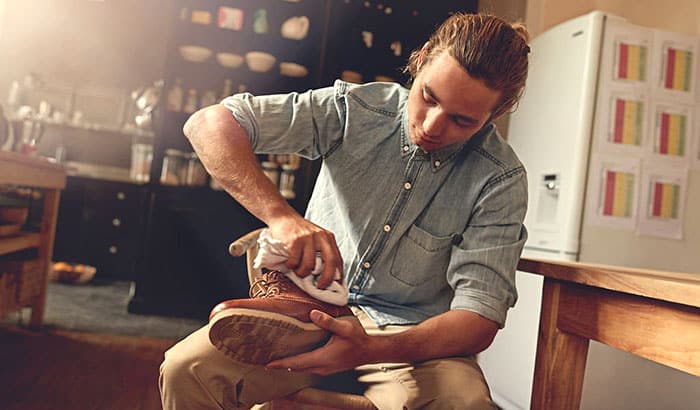
Step 1: Start the Cleaning Immediately After the Hike
It is essential for you to start cleaning your shoes immediately after the hike. The reason behind it is to prevent the mud from drying up and getting stuck in some hard-to-reach areas of your shoes. You will need to keep the walking boots clean and not ignore the mud and other dirt you brought at home.
If it is your habit to throw your walking boots immediately after the hike, you need to stop that habit. What about cleaning the shoes immediately by putting your shoes in running water under the faucet to remove all the dirt that clings to the surface of the shoes. The water will be your primary cleaning agent as you try to remove all the dirt.
Step 2: Remove the Insoles from your Shoes and Clean Them
After initially removing all the dirt on the outside surface of your shoes, you can remove the insoles for the cleaning process. You can use a bucket with warm water and a medium-stiff brush to clean your boots and soften all the dirt found on the insoles.
In washing the insoles or any other part of the shoes, please avoid using cleaning detergent because it can affect the material of your walking boots. After rinsing and cleaning the insoles, put them to dry in a well-ventilated place.
Step 3: Remove the Lace of your Shoes
After removing the insoles and cleaning them, you can also now start removing the lace of your shoes. The purpose of removing the insoles and the laces is to let you clean all the hard-to-reach spots of your walking boots.
But first thing first, once the laces are removed, you can immediately wash and clean separately. If you feel there is no need to wash them, you can set them aside for your convenience.
Step 4: Cleaning the Shoes with Water and Brush
Once the insoles and the laces are removed, you can now start cleaning the walking boots. Use lukewarm water and a medium-stiff brush to scrub all the parts of the boots. Make sure to remove all the mud and other forms of dirt that clings on the different spots of the shoes.
If you have footwear cleaning products available, you can use them to tackle the dirt that builds upon different walking boots. Make sure to scrub those spots which are challenging to reach and remove every dirt you will find along the way.
Step 5: Let the Shoes Dry
After cleaning every part of your shoes, you can now start to let them dry. Leave your walking boots in a room temperature and a well-ventilated area. However, it is essential not to leave them in direct contact with the sunlight since it can possibly damage the material of the shoes.
If you want to speed up the drying of your walking boots, you can fill up the inside of your shoes with newspaper. Once all the parts of the walking boots are completely dried, you can return the insoles and put the shoelace back.
Now, if you feel that the smell of the shoes is still bad, do not take them for granted. Usually, the foul smell will come from the inside of your walking boots. You can use an anti-odor or disinfectant spray to eliminate the foul smell completely.
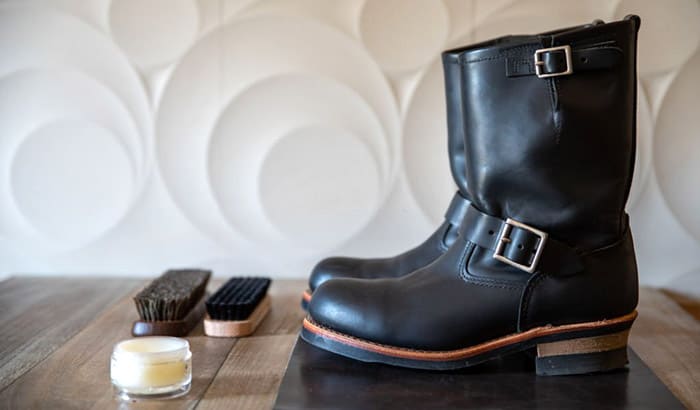
Step 6: Reactivate the Waterproofing Features If Needed
If your walking boots come with waterproofing features such as a Gore-tex type membrane, you can actually reactivate this special feature. There are many waterproofing sprays that are made to do this purpose specifically.
The key is to clean your shoes thoroughly, let them dry, and use these footwear waterproofing products to reactivate the waterproofing features. Just make sure to follow the product’s instructions to maximize the result and enhance the waterproofing feature of your walking boots.
Step 7: Clean the Walking Boots as Needed
If you are a constant hiker, you can always ask how do you often clean your shoes? Basically, if you are coming from a muddy hike, you can immediately clean your walking boots. But in general, if you are lazy about cleaning the walking boots, you can permanently remove your insoles and leave your shoes to breathe after every hiking activity.
Conclusion
Knowing how to clean walking boots properly is very important to make your shoes last longer. You can make it a habit to clean your walking boots immediately after hiking, especially if they are covered with mud. The mud and other forms of dirt in the shoes can degrade and damage your shoes’ quality if it is not immediately removed.